Diving into Kube-bench Policy Report Adapter-Summary of LFX Spring Mentorship for CNCF:Kubernetes
June 21, 2021
Spring - it’s not just the departure of cold winters or the announcement of summers- it is that time of the year when flowers bloom in grace, the sun smiles warm and the fresh breeze of air yoked in honey brings emotions of joy, hope and life and sometimes - all these things - may come wrapped up in the mailbox with an email like this :)
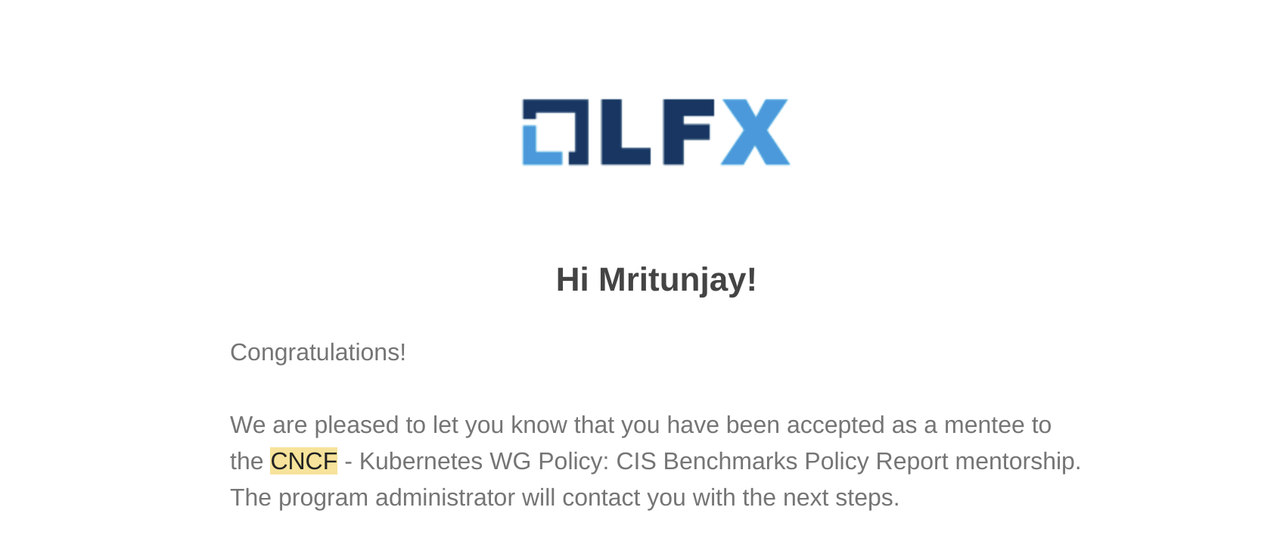
While I was still taking some time to process, the email certainly read that I was selected in LFX Spring Mentorship Program to contribute to the CNCF - Kubernetes WG Policy: CIS Benchmarks Policy Report under the mentorship of Jim Bugwadia.
With all the joy and enthusiasm, mentorship began in March'21 and this blog is an attempt to share my experience regarding what is this mentorship all about, what I learnt during this program, and what are my tips for all the future mentees reading it right now :)
How did I come to know about the LFX Mentorship Program?
I found out about the LFX mentorship program (then known as Community Bridge Mentorship) during the opportunity I got to attend Open Source Summit Europe-2019 in a talk by Shuah Khan (Linux Fellow - The Linux Foundation).
As the Linux Foundation calls it, "The Linux Foundation Mentorship Program is designed to help developers — many of whom are first-time open source contributors — with necessary skills and resources to learn, experiment, and contribute effectively to open source communities. By participating in a mentorship program, mentees have the opportunity to learn from experienced open source contributors as a segue to get internship and job opportunities upon graduation."
Tips while applying for LFX Mentorship Program
Here are my tips for a successful application to this competitive program:
- The best tip is to start early and if you want to apply especially for CNCF projects then I will definitely recommend you to keep a
Watchon this repo to stay updated about the projects and program details which are released quarterly. Explore and try to find the project that matches your skills or in which you see a potential to further grow. - Try to join and participate in the respective project’s community channel (like in Slack or Discord, wherever the community resides)
- Dive in by finding a
good first issueand try to resolve it. (tip from my mentor, Jim) *Communicate your understanding about the project and your interest and if the mentors suggest then you can also work on the proposal of how you plan to approach it (this is not required in the official process but can be done if the project or the community prefers so) - The applications related to CNCF projects require mainly two tasks - Updated CV and Cover Letter.
- The Cover Letter should answer each question the task mentions and at the same time - try to be concise and let your work speak for yourself in it.
- Last but not the least, all the best :)
Let's discuss the project!
Kubernetes, also known as K8s, is “an open-source system for automating deployment, scaling, and management of containerized applications”.
In the Kubernetes API, a resource is an endpoint that stores a collection of API objects of a certain kind. The standard Kubernetes distribution ships with many inbuilt API objects/resources (example: Pods). CRD comes into the picture when we want to introduce our object into the Kubernetes cluster to fulfil our requirements.
Once we create a CRD in Kubernetes we can use it like any other native Kubernetes object thus leveraging all the features of Kubernetes like its CLI, security, API services, RBAC etc.
The Kubernetes Policy WG is defining a Policy Report CRD to help unify outputs from multiple policy engines. This helps cluster-admins with managing clusters as policy results can be viewed and managed easily as Kubernetes resources from any Kubernetes management tool (kubectl, dashboard, Octant, etc.)
The project scope was to create a tool that periodically runs a CIS benchmark check like kube-bench and produces a policy report.
Journey through building the project

And guess what? Compounding does its magic here as well! This project which as it looks now is not an outcome of some out of sudden wisdom from heaven but a daily incremental effort in iterating the design and logic of our solution in regular coordination with my mentor Jim and the community.
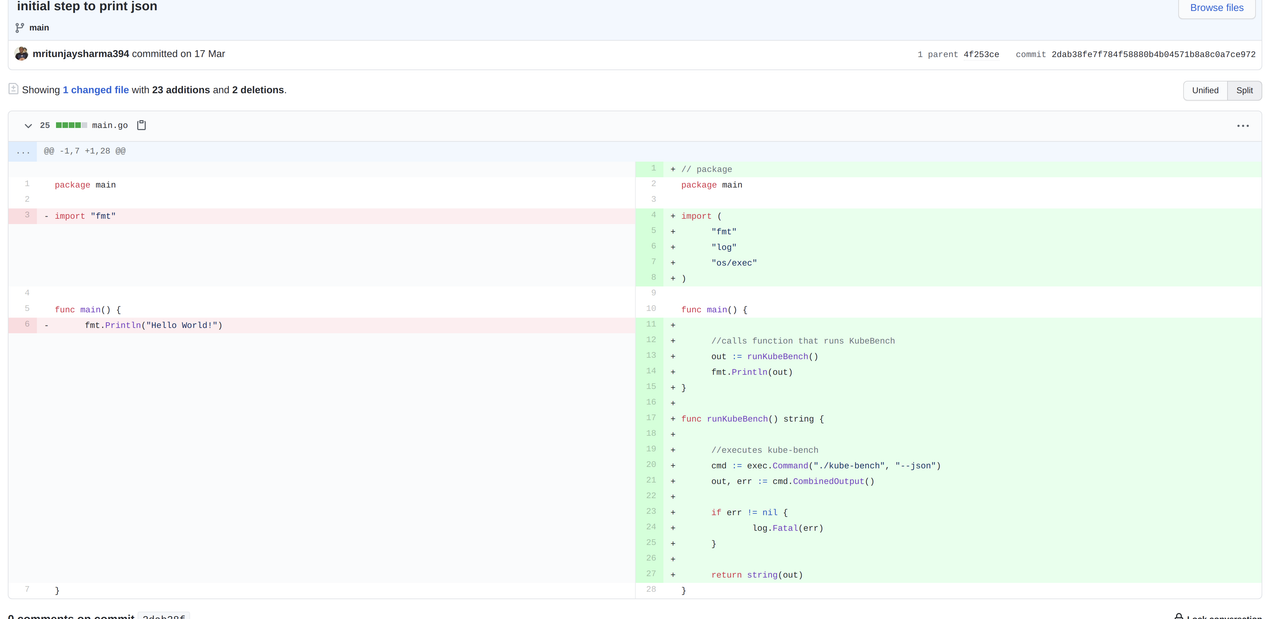
When we began the project, we got the JSON output working and we were able to print it as well but we still didn’t have controls over the outputs? By control we mean, how to use the outputs programmatically to maybe print them or assign a particular value of the output to a variable? This required two things:
- struct of
kube-benchoutput - JSON output stream to be decoded
It may sound tedious and yes you may call me a noob but doing the first task required studying the entire JSON output more than 20 times to figure out how it’s taking shape. It was later my mentor helped me with the suggestion that the entire struct is already defined in the kube-bench codebase in the check package.
Completing the second task was also tricky because the kind of output we were getting from the stream didn’t allow us to use json.Unmarshal and so we decided to go with this:
out := runKubeBench()jsonDataReader := strings.NewReader(out)decoder := json.NewDecoder(jsonDataReader)var body Bodyerr := decoder.Decode(&body)if err != nil {panic(err)}
The above two steps solved our problem and we were ready to go to our next step. This step involved designing an approach through which we can interact with the Custom Resource Definition.
Let’s understand first what this means, when we have to create CRDs in our cluster, we usually follow a step like this:
kubectl create -f crd.yaml
Everything is fine till here but what if we want to programmatically create our CRDs? And not only access but create or update its objects? And do we even need to create objects of CRDs? Well, the goal of our project revolves around the creation of policy reports which here is nothing but an object of the CRD we have defined :)
How do we do this? Meet the Kubernetes’s code-generator :) It is nothing but the sheer beauty of it that the client codecs for our CRDs were generated using it and we can safely move to our next step - mapping the kube-bench JSON to the CRD fields!
But what are we mapping? And why are we mapping? Let’s try to understand. The struct responsible for kube-bench outputs is different from the struct that has been defined for our Policy Report CRD and if we want to create a policy report that has the outputs of kube-bench, we need to map it and this mapping was initially discussed in this Mapping of kube-bench JSON with Policy Report
Here’s a snippet of how it was being mapped in the form of code:
Summary: policyreport.PolicyReportSummary{Pass: cisResults.Totals.Pass,Fail: cisResults.Totals.Fail,Warn: cisResults.Totals.Warn,}
The full implementation of the mapping can be checked here
We now had two important deliverables of our project ready:
- Mapped the kube-bench JSON
- Client code to interact with CRD to create and update our policy report.
However, we still were running kube-bench in a way that was tedious for the user and so after a lot of brainstorming and iterations we came up with the idea of programmatically creating a Kubernetes Job that will create the pod to run kube-bench and get outputs from it. The pod and the job is automatically deleted after we have achieved our objective of running kube-bench and getting its output.
Now that it was done, we had another rider that needed to be fixed. If we refer to the kube-bench repo, we will find about the multiple targets and their corresponding yamls. In our adapter, we wanted to give the user the facility to choose the target YAMLs to generate the respective policy report but this would have ended up in the user downloading additional YAML files from the kube-bench repo which we thought would not be a great idea.
Thanks to go:embed, we were able to embed the static kube-bench yaml files in our binary which reduced the user’s step to fetch for the YAMLs. In the final adapter, we will observe later that all that the user needs is the name of yaml and not the file itself to create the respective policy report.
We had almost everything ready by now and what we needed was to write the policy reports. By writing policy reports, we mean that we write (create) policy reports in the cluster and if we have an existing policy report with the same name, it gets updated. The implementation of this piece in the form of code can be found here.
Stitching all these together, if we look at this snippet of our main.go (all magic begins here) is how the big picture finally turns out to be :)
//run kube-bench jobcis, err := kubebench.RunJob(kubeconfig, kubebenchYAML, kubebenchImg, kubebenchVersion, kubebenchBenchmark, kubebenchTargets, timeout)if err != nil {fmt.Printf("failed to run job of kube-bench: %v \n", err)os.Exit(-1)}// create policy reportr, err := report.New(cis, name, category)if err != nil {fmt.Printf("failed to create policy reports: %v \n", err)os.Exit(-1)}// write policy reportr, err = report.Write(r, namespace, kubeconfig)if err != nil {fmt.Printf("failed to create policy reports: %v \n", err)os.Exit(-1)}fmt.Printf("wrote policy report %s/%s \n", r.Namespace, r.Name)
With all this, our kube-bench adapter was ready but we needed something to run it periodically in the Kubernetes cluster and that is where CronJobs came to our rescue. CronJobs are used to run a particular task periodically and if you want to read in detail about it, it can be found here
Let’s create our first policy report.
Okay, now that you know how the project was built, let’s use the project by following this example and creating our first policy report using a cron-job:
Step 1. clone the repository
git clone https://github.com/kubernetes-sigs/wg-policy-prototypes.git
Step 2. Enter the directory
cd wg-policy-prototypes/policy-report/kube-bench-adapter/
Step 3. Create a Kubernetes cluster
kind create cluster
Step 4. Create a CustomResourceDefinition
kubectl create -f kubernetes/crd/v1alpha2/wgpolicyk8s.io_policyreports.yaml
Till now, we have cloned the repository, entered the directory that contains our project, created a local Kubernetes cluster and created our CRD.
In the next steps, we will discuss how we can run it using a cron-job.
Step 5. Create Role, Role-Binding and Services
kubectl create -f kubernetes/role.yaml -f kubernetes/rb.yaml -f kubernetes/service.yaml
Step 6. Create cron-job
kubectl create -f kubernetes/cron-job.yaml
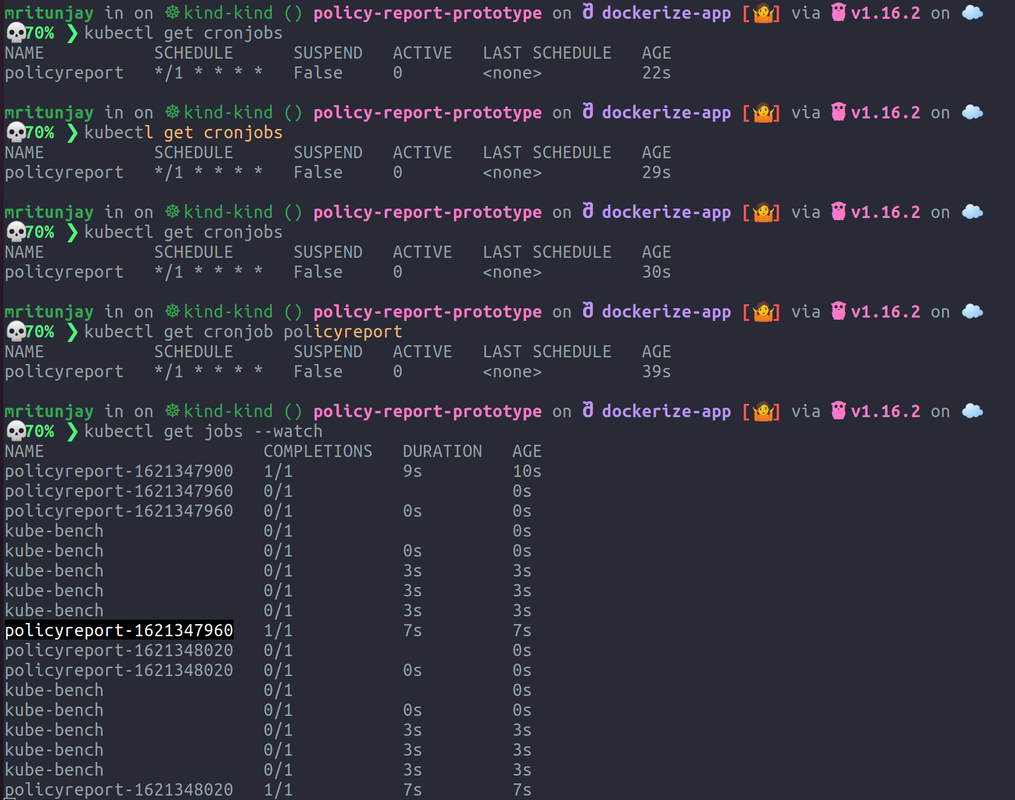
Step 7. Watch the jobs
kubectl get jobs --watch
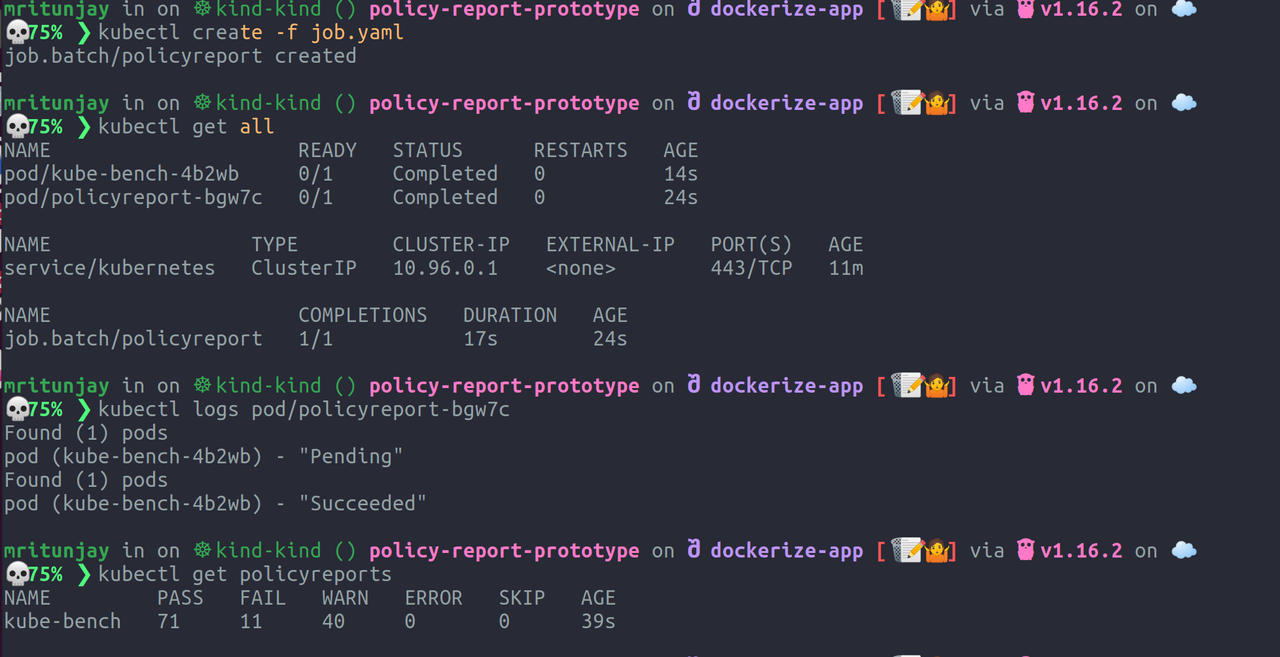
Step 8. Check policyreports created through the custom resource
kubectl get policyreports
Let’s discuss step 5, in order to run our adapter in-cluster, we required some permissions that enabled us to access the creation and deletion of the policy report as well as the permissions to create a job for running kube-bench. This was done using step 5 where we granted the required Role-based access control (RBAC) which is a method of regulating access to a computer or network resources based on the roles of individual users. You can read more about RBACs here.
Step 6 does the main magic for us and for the sake of example, this cron-job runs every hour, however, this can be changed by the user and you can read more about it here
In step 7, we check for the scheduled jobs, whether they are working or not and don’t worry if you observe that your terminal is frozen, it’s most probably because you are “watch”ing the scheduled jobs.
For step 8, you can use another terminal session and execute the command to check if your policy report is created and what is its status and if all works fine, it should show something like this:
What I learnt
Coming from a background that was more close to embedded or pythonic and C (Kernel) development, this was my first big stint with Golang and cloud-native technologies like Kubernetes.
Here’s a list of all the technical and non-technical things that I learned:
- Learning golang was a mixed experience, it was quick but I had to unlearn my pythonic style. Few good resources to begin with golang are - https://gobyexample.com/ and the documentation itself.
- Kubernetes is no doubt a huge project and as a beginner, most of my doubts were resolved with this Twitter thread by one of the most amazing members in the community, dims.
- After that, I learnt more specifically about CRDs in Kubernetes and read how to create their objects programmatically and one of the most important references came from this book
- The above point alone is a journey that made me understood the usage of packages like client-go and code-generator which helped me achieve a lot of deliverables of the projects.
- Apart from technical things, this mentorship also helped me evolve my soft skills, it made me a better communicator (which I feel is more important sometimes than coding itself) and all this eventually contributed to making me a better open-source citizen.
Scope for Improvement
- One of the areas that need improvement is testing. During the initial design of the application, I implemented a unit test when we had minimal working prototype initially but later on, it was suggested to write both unit test and e2e tests after completing the prototype and moving it to our official repo.
- We plan to look forward to feedback from other community members and continue to improve this project
Concluding it all
And that’s a wrap, what an amazing journey it has been, thank you so much for continuing this long and trying to understand the project as well as my journey as an LFX mentee for CNCF: Kubernetes. I would like to express my gratitude to my mentor Jim Bugwadia for being such amazing support throughout the project. Heartfelt thanks to the Kubernetes, LFX and CNCF community as well without whom neither this project nor this program could have been possible.
The link to the completed project is here and if you have any feedback or questions, feel free to reach out to me on Twitter and I will be glad to talk and help :)
Thanks a lot!